Pacemaker Fishing Forum
Welcome Aboard!
You are not logged in.
#1 Dec-19-11 7:52AM
- Bryan
- Patagonian Toothfish

- From: Bealeton, VA
- Registered: Mar-18-11
- Posts: 1206
Winter panfish: Making your own spoons
Every winter I chase panfish from piers and bridges, mostly by vertical jigging. The majority of the time I do this with small spoons that I make at home. I've caught thousands of fish on them, and every winter a few onlookers will ask where I get them or how I make them. So I figured I'd put together a step-by-step post in case anybody here wants to try. It's really easy and anyone can do it.
You need:
1 hook
craft wire
pliers
hammer
size 7 split shot
colored paint and/or foil
clear paint or epoxy
dressings for hook (optional)
I start with the hook. I will use either a #10 or #12 Gamakatsu octopus hook, depending on what size spoon I'm making. I fish snaggy areas, so trebles are out of the question for me.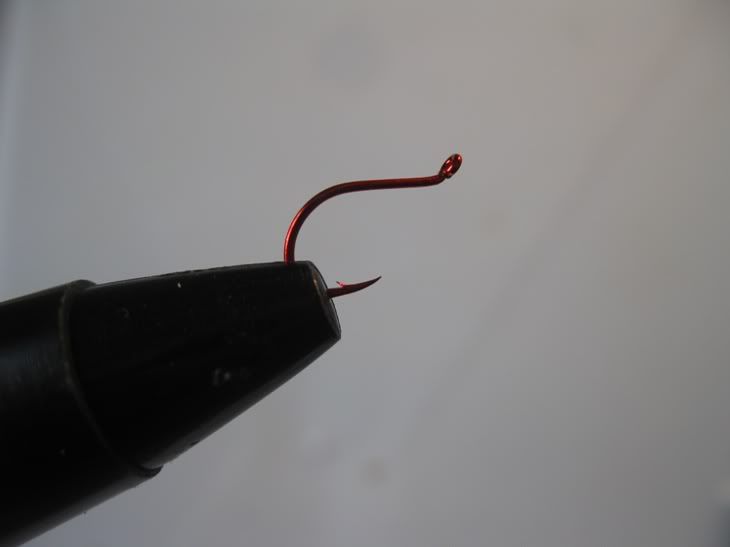
A plain hook will work, but I like to use some dressing for a little extra appeal. There are endless ways you can dress your hooks. Feathers, flash materials, silicone, and colored threads in any combination will work.
For this example I used a few pieces of chicken hackle, and wrapped glow-in-the dark thread along the shank. A drop of super glue on the threads makes it virtually invincible.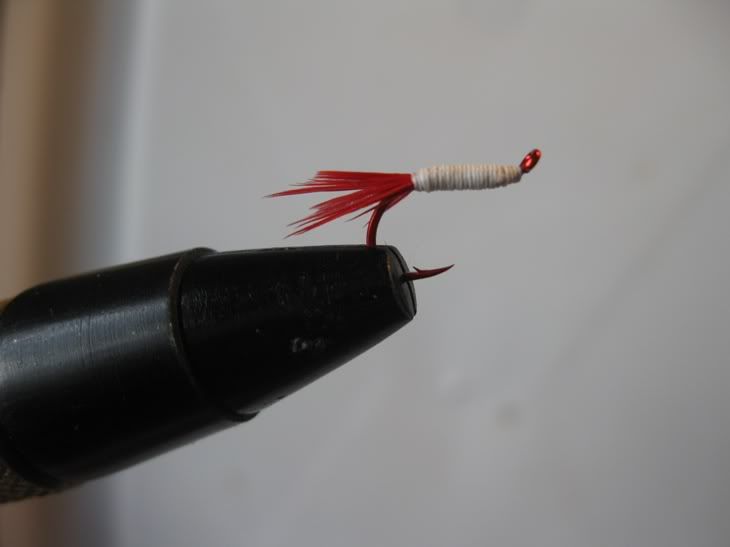
The next step is forming the wire. I use a 26 gauge craft wire that you can find at any craft store or "Mart" for a couple bucks. This stuff is extremely easy to bend, and cuts easily as well. That sounds kinda iffy, but I have never broken it on a fish. I've had this same spool for years and obviously have quite a bit left.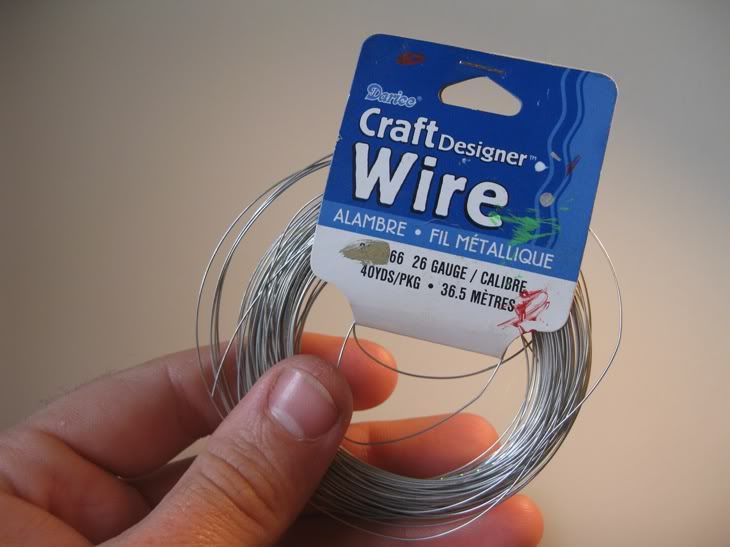
You only need a couple inches of wire per lure. Cut off a piece and slip it through the eye of the hook. Bend the wire so it forms a skinny loop, and wrap the tag ends around the middle of the wire a few times and clip off excess. A finished loop is usually about 1/2" long for a typical spoon. That's probably a confusing explanation, but it should look something like this: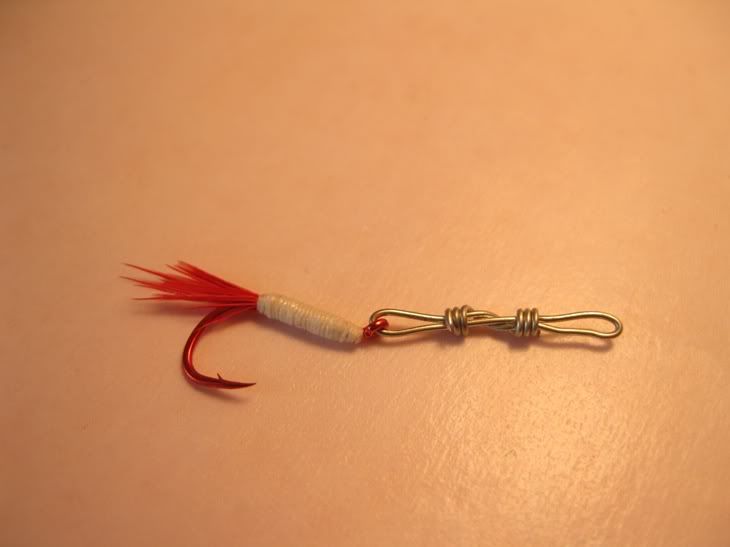
You need to flatten out that knot of wire. If you don't do this your spoon is going to be a mess and will fall apart. I normally squeeze it with the flats on a pair of needle nose pliers. Pounding it flat with a hammer works as well. Don't worry, your wire will still be plenty strong.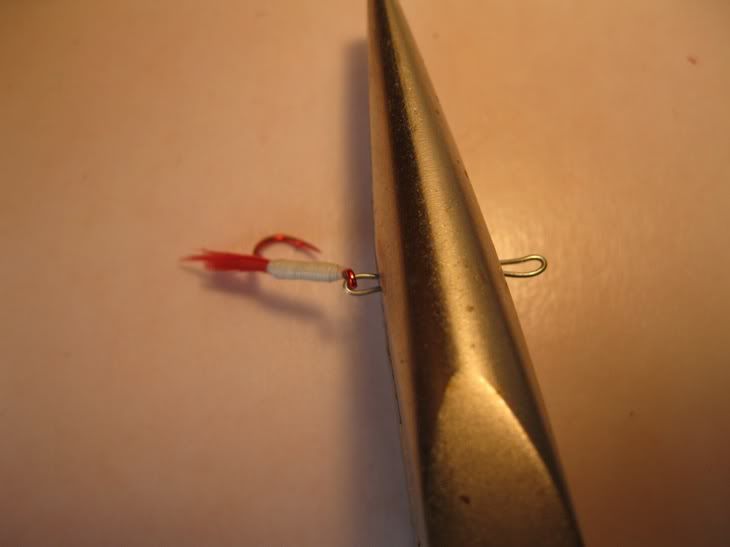
Now we're going to make the body of the jig, no lead pouring necessary.
I normally use a #7 split shot. It's a little more than I need, but I'd rather have too much lead than too little. Place the split shot on a hard, flat surface. The anvil of a bench vise works great. 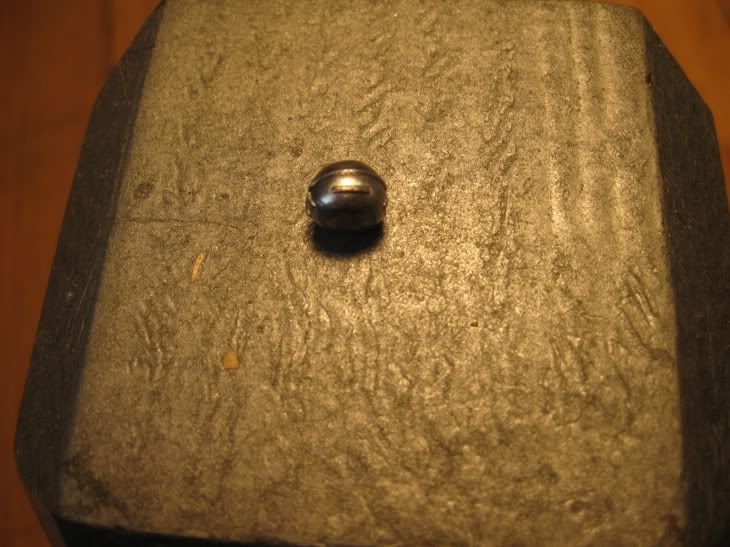
Now pound that sucker flat. You don't want it paper thin, but you want it to be thin enough that it can easily be trimmed by scissors. I'd say 1mm thick is about right for a typical spoon.
This is what your split shot will look like after pounding it. The shape will vary each time, but it doesn't matter because it's going to be trimmed anyway.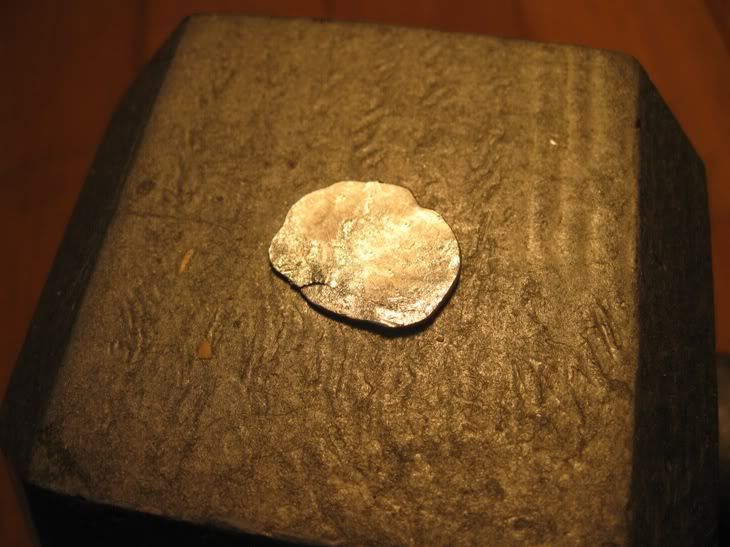
Next I'm going to cut the lead roughly the size I want. Cut two pieces of lead close to the same size and shape, they don't have to be perfectly symmetrical. Remember to leave a small loop of wire at the top and bottom, one for the line tie and one where the hook hangs. A free-swinging hook is critical. It hooks more fish, and makes it much easier to free the lure from a snag.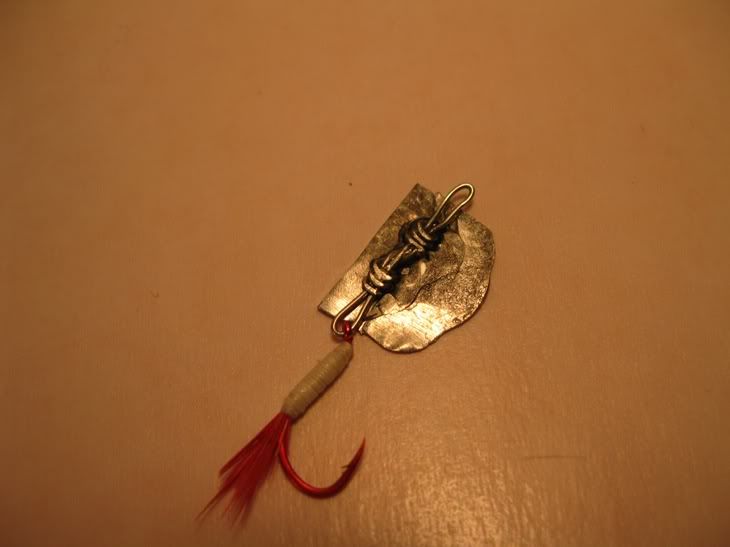
Lay the wire and hook assembly down on one of your lead pieces, and put a drop of glue right where the "knot" of the wire is. Now put the other trimmed piece on top of that. Put this wire and lead sandwich in a pair of pliers, and squeeze it together firmly until the whole thing is nice and flat.
Now it should look something like this.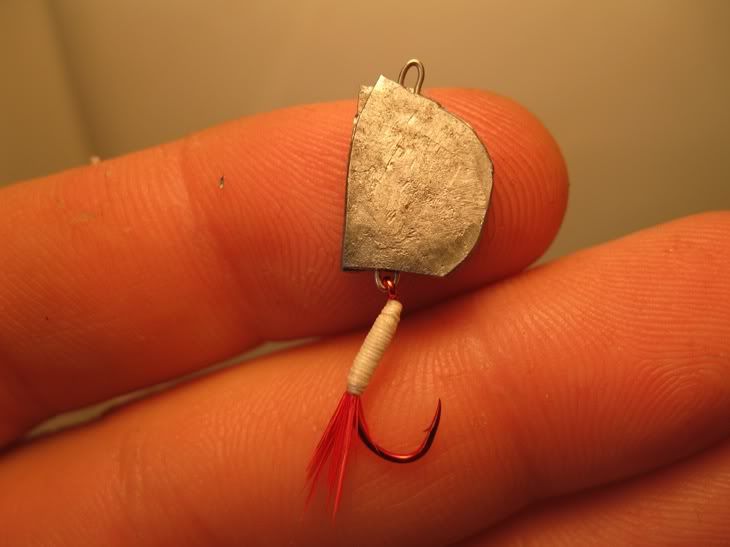
The building part is done, so now you can shape and color your spoon any way you want. I'm partial to a half-moon shape spoon, but in my experience it doesn't matter much. Just trim the edges of the spoon with scissors or a razor blade until it looks like you want it to.
For color, I use paint pens from the craft store. These lures are small, and I'm too clumsy for a brush, so the pens are perfect. In the past I used aluminum foil to give my spoons flash, but stick-on holographic foil is easier to use, and looks better.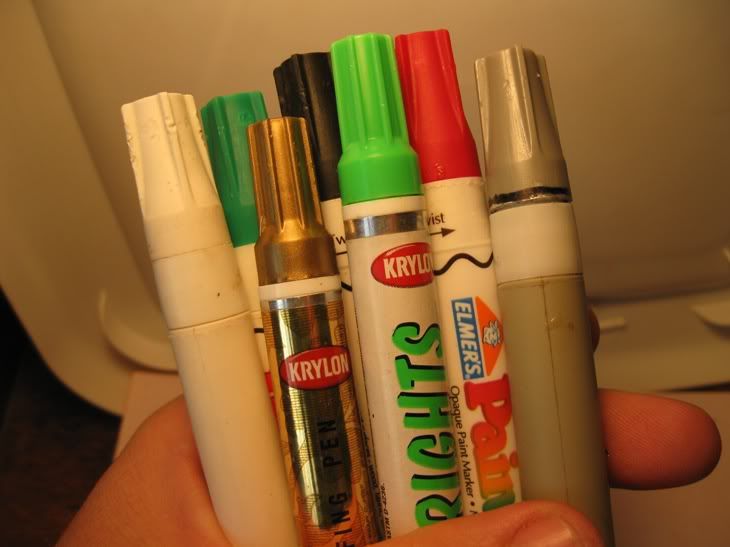
For this one I used a combination of holo foil, with some paint to color the back, and to make a red gill. You can add eyes with paint, or use eye stickers. I used stickers for this one.
Here's the lure after decoration is complete.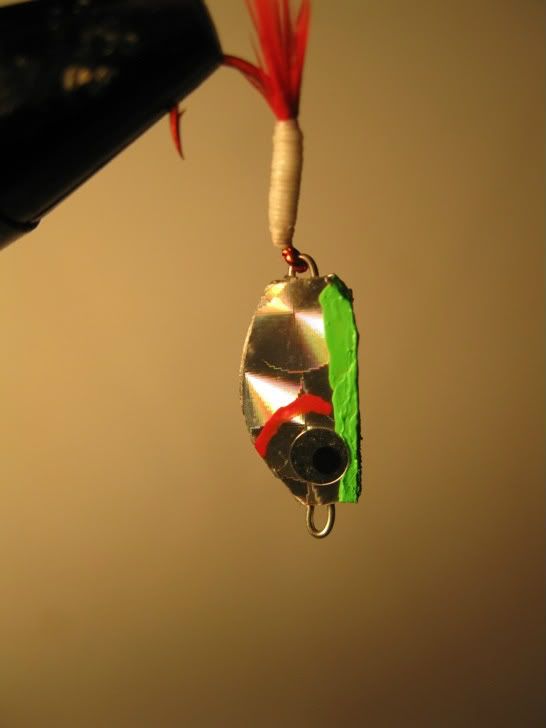
All that's left now is to add a protective coat to keep the paint on and help hold everything together. You can use either clear paint or epoxy. I prefer a thin layer of 5-minute epoxy. Once it's set, the spoon is tough as nails.
Here's the finished product.
These are just basic guidelines for putting one of these lures together. The potential variations of size, shape, and color are endless. I'm not the most artistic guy in the world, so my creations aren't always pretty, but they do always work. Here are a few examples of some recent builds: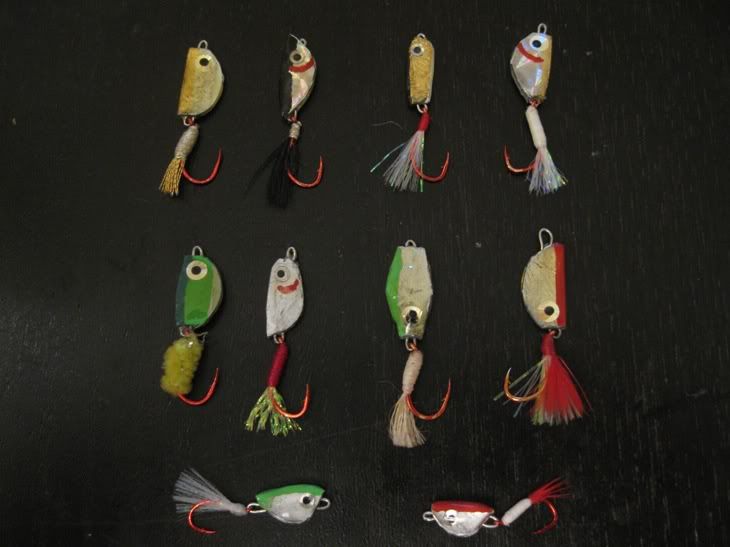
Most of this group have already caught fish.
I like to fish these lures on an ultralight rod with 4lb test, or 2lb if it's a tough bite. I normally fish them plain, but sometimes I'll add a Gulp waxie to the hook, especially if the water's dirty. I catch crappies, perch, sunfish, bass, walleye, and more on these things.
If you fish snaggy areas like I do, making your own lures is a great way to save money. A similar spoon bought in a store would be at least 2-3 dollars. You can make one of these for under 50 cents, and it will work just as well.
tight lines
Offline
#2 Dec-19-11 8:29AM
- Bass Hunter
- Northern Snakehead

- Registered: Oct-19-07
- Posts: 727
Re: Winter panfish: Making your own spoons
Thanks for the great post Bryan! I too, am a panfish fanatic and might have to try this out.
Offline
#3 Dec-19-11 8:34AM
- Ernie
- Administrator
- From: Ashburn VA
- Registered: Feb-03-06
- Posts: 15673
Re: Winter panfish: Making your own spoons
Very good work Bryan!!
I am a fan of the Sliver Buddy but detest treble hooks. You have the answer!!
Are you taking orders?
Time to go fishin' again!
Offline
#4 Dec-19-11 11:26AM
- Bryan
- Patagonian Toothfish
- From: Bealeton, VA
- Registered: Mar-18-11
- Posts: 1206
Re: Winter panfish: Making your own spoons
Pacemaker wrote:
Very good work Bryan!!
I am a fan of the Sliver Buddy but detest treble hooks. You have the answer!!
Are you taking orders?
I like Silver buddies a lot too. Also a fan of Reef Runner Cicadas. I wish they didn't snag so much.
The stuff I make is not high enough quality to be sold ![]() . You should try making some of these at home.
. You should try making some of these at home.
tight lines
Offline